In this page I am going to present you the necessary tools that a beginner modeler needs.

Its extremely wrong to pull or grab the parts from their place because you may give damage. In order to take the parts out without giving any damage you can use the side-cutter of Tamiya or if you cannot find it you can use a side-cutter that is use by electronic technicians. They use side-cutters to take out small devices from the devices and plates.
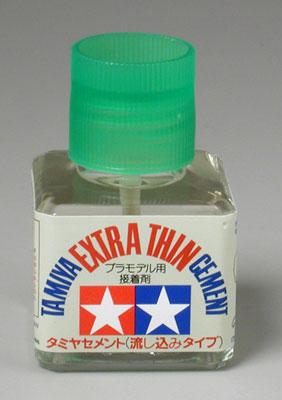
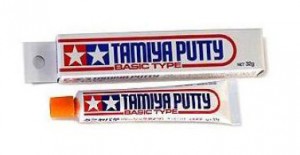
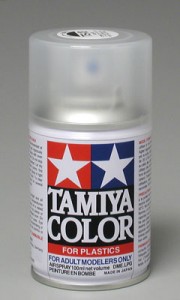
In order to stick the parts together smoothly, you can use the Tamiya extra thin liquid cement. We call it Tamiya Green Head J Because this cement is liquid it directly penetrates between the parts and stick them together. It does not live any dirt or mark on the plastic as its liquid and evaporates immediately. It will immediately stick the parts together even if you place the tip of the brush with a small amount of cement to the joint of the parts. You have to be careful while applying the cement. Do not put any cement between your finger and the plastic part while working otherwise it will directly copy your finger print on the plastic. This situation may distort details. You can fix it with a sandpaper but still there may be errors on it.
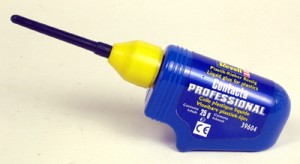
This is the glue of Revell. By its long and thin metal tip you can apply the glue to the areas where its hard to reach.Drying time is longer than Tamiya.
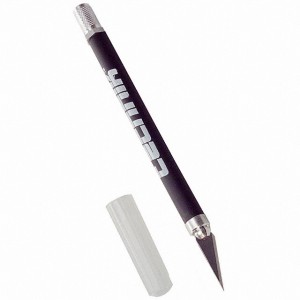
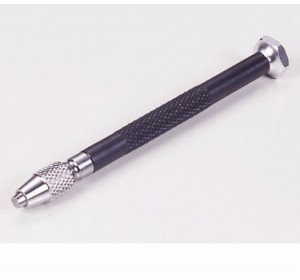
By using a model knife or a small lancet attached to the pen you can cut off the burr or small defections.
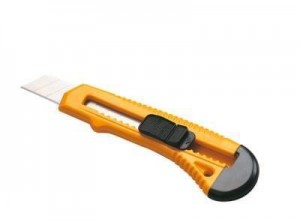
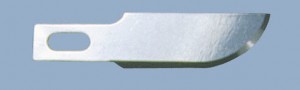
You have to be careful while using this cutter because its is sharper than a model knife.
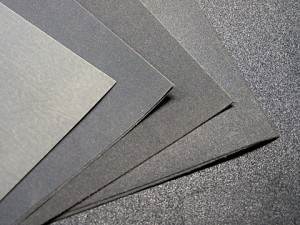
On most of the model kit parts you can see unwanted marks or joining marks that are made during the molding process. In order to clean and fix these minor marks you can use a sandpaper in a smaller micron. You can apply sandpaper with water. This prevents you from scratching the plastic and from its dust.
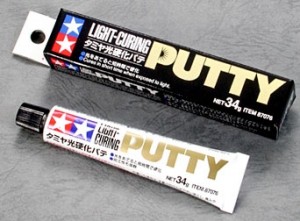
And this is another product of Tamiya. This type of putty hardens under a light source such as lamp, fluorescent or sun light. Thats why you have to keep the cover always closed. According to other one this putty will become elastic. You should use sandingpaper more careful on it.
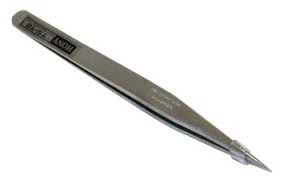
You can use a pair of tweezers to hold the small parts and stick them inside the kit where its hard to reach. A tweezer keeps the glue away from your hand and it helps you to stick the part to its place without any damage.
 Sometimes you may need to open holes to the parts that are already marked. You can use a hobby drill and suitable drilling bits to open the holes. You may give damage to the parts if you try to open holes with different tools. If the hole is too small or short then you can use a pin.
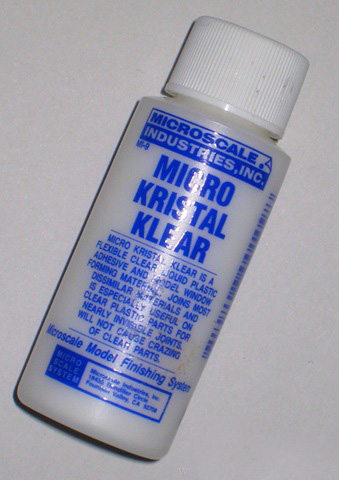
Its very easy to stick the clear parts with MICRO KRISTAL KLEAR product.This product is especially made to be use on clear parts such as windows, head lights, stop lights and other parts. When it dries it becomes clear like the part. You cant see any dirt or unwanted glue marks like you see when you use other products. Also you can pull the parts easily when you stick them wrongly. Glue does not stain on part or model kit. You can clean the parts in your hand with a piece of fabric or even you can clean them under water.
I never suggest you to use Cyanoacrylate adhesive on clear parts. If you still use it in closed areas such as inside a plane canopy or inside the head light glass the areas immediately becomes dull and whiten. Its harmful to smell this adhesive as it has a dangerous vapor and this vapor causes the parts become dull and whiten. You can not fix this problem until you use a sandpaper.
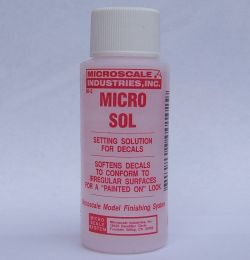
Micro Sol is another product of Microscale company and you can use it on decals. Sometimes its hard to apply decals on model kits. Especially it becomes harder on irregular forms and embossed areas. This liquid product is made for it. It helps you to apply your decals on these areas easily without any damage or problem. First of all wipe the decal gently from top with a piece of soft fabric or a piece of napkin to take out the excess water and air bubbles under the decal paper. You can also use a q-tip for this process. Do it slowly to avoid giving a damage to your decal. Slowly and slowly all air bubbles and water will come out of it. After this apply the liquid gently to the area where you want with a flat-tipped brush. The area of the decal where you applied the liquid will become softer and the view of it will look cracked after a while. When the decal paper becomes softer all the details of the kit directly transfers on it. Do not think that the decal sheet is damaged when you see its cracked and do not try to fix it with a brush. Rather it seems like that because its softer at the moment. After a while micro sol dries and the decal turns back to its normal view. Avoid touching the decal when it is too sensitive or you may give damage.
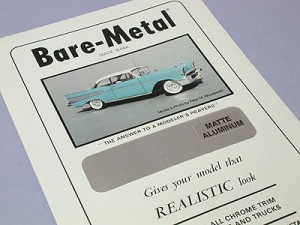
Bare – Metal is a kind of product that most of the modelers feel pleasure during the applying process. Although its a hard process for amateurs, they can learn it in time. In some cases the original chrome paint of the parts may peel of or they may come out damaged. You may also need to cover some parts of the car, truck or other vehicle with this metal. This product adds a metallic view to the area where applied. You may have it in different color versions (Gold, copper, aluminium, chrome). Even in matt and extra bright. First of all do not take the entire bare metal sheet out of its cover. Only take out a small part that you are going to use. Do not touch on the bare metal foil as it will leave finger print on it. Put the outer part on a plastic or cartoon platform to cut is straightly. Place a metal ruler on it and then press down to keep the sheet stable.
If you use a thin and sharp cutter you may give damage to the sheet as its too thin. I suggest you to use a rounded cutter shown in the picture above. if possible cut the foil in two or three times, rather than all at once. Do not press the cutter strongly. Press it gently. By this way you have a straight and smooth piece. After this use your thin and pointed tweezer to hold the foil that is already cut. Hold this part up gently but do not pull it at once. If the part is to thin like a line pulling it up will cause it to twist around itself. To avoid this situation hold the opposite side of the bare foil with your fingers. Hold the part a little tight and then apply it to the place you want to. During this process do not touch the under side of the foil as it does not have a strong adhesive. If you touch under side you cause the adhesive become weaker. Slightly press on the bare metal foil with a q-tip to take the shape of the location. If you see any excess piece outside the applicated area then you can cut it with the same rounded knife. Do not press the knife strongly or you may damage the paint of the model kit.
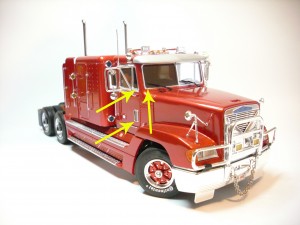
Yellow marked areas are covered with bare metal foil. You can not see any difference between the bare metal covered parts and fabrically chrome plated parts. After you learn using the airbrush you can use ALCLAD series metalizer paints to have more realistic chrome or metallic view.
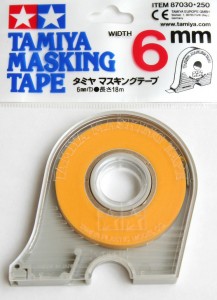
A modeler usually needs a masking tape. Because they do not contain a strong adhesive you can use them on any kind of paint, primer or decal. It never pulls the paint or decal do to its weak adhesive.
You can apply the masking tape to the place where you do not want to paint. Later you can pull it up without giving any damage to the base. You must use a wider tape if you are going to use 2 different colors on the same kit. Although these masking tapes are paper material they do not absorb the paint and let them base. But if you apply the paint with a brush then the paint may leak under the tape. These tapes are suitable for airbrush or spray paint works.
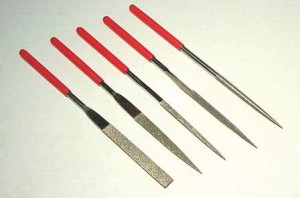
This is a hobby file set for modelers. You can use them on rough and deformed parts. Because they are thin formed, they can easily reach to the places where a cutting nife or a pen lancet can not reach. Choose any of them according to the fields to be applied
Paste & Wax
Not always the paint of the model looks smooth, dust free or proper. Once the paint gets dry you can see defections, small dust grains or rough areas. If the view of the paint is not too bad then you can use the pictured Compounds to correct the defects. .
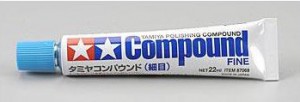
This Compound is called “FINE” because it contains granules inside. The granules may remove the paint if you apply it directly on the paint. It removes the paint if you apply it to the areas where the paint can not hold itself strongly such as corners or embossed lines/parts. Because of this its suggested that you apply it after the paint is varnished. With a piece of cotton or a fabric you can apply this compound/paste to the dusty and rough areas in circular motion. After this process you will see that the paint is dust free and more glossy. If you apply the compound to the entire area then the model will look glossy.You will be satisfied from the result. There may be scratches on the paint if you press hardly. Its recommended that you first apply the paste to a small area and then to other areas.
The inner areas, small cavities will be covered with granules when you apply the compound to the whole model. To clean these areas from granules just wash the model under the warm water with a foam and detergent. All granules will flow away and you will see a glossy model.
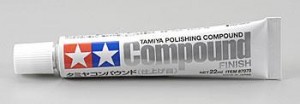
This is the second stage of model polishing. “FINE” compound contains granules but this one is just like a cream. When you apply this cream onto the first one, the paint will look more and more glossy and the result will be perfect. Application is same like “FINE”. This cream does not take off the paint. Model can be left to dry after you wash it under the water.
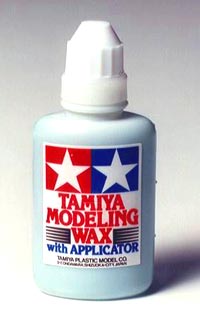
This wax completes the stage. It gives an extra brightness to the paint if you use it with its own applicator.
Paint, Thinner and Primer
All plastic kits must be painted before assembling. There are variety of colors, primers for modelers to paint their models. Although modelers can apply these paints with a brush, they can also apply them with an airbrush and compressor when they become professional.

During the production phase all the plastic parts are covered with a thin layer of fat. The reason is to prevent the parts from sticking to the mold. The paint will not hold itself strongly if you apply it directly to the greasy plastic. Also you may remove the paint if you apply a masking tape on the model. To avoid these problems you have to wash all plastic parts (except clear parts)with warm water and detergen and then you should leave them to dry. Do not use a napkin, fabric or other materials to dry the plastic parts. These kind of materials loads static energy to the plastic and because of it the plastic takes on both dust, hair …You can not apply a primer or paint on such a dusty model.
Above you can see Tamiya’s Fine Surface Primer which is the preferred by many modelers.Applying is simple and drying time is short. After it gets dry you can apply paint on it. Neither the masking tape can remove it from the plastic. The primer has 2 colors. For dark color base you can use gray primer and for bright, metallic or light colors you can use white volor primer. On gray color plastic dark colors look darker on white color plastic colors become more vivid and bright.
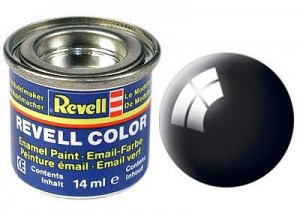
Revell’s enamel colors are mostly use by modelers. It will take long time to dry if you directly use the paint on your model. For this reason you have to use it with its own thinner to make the paint thin. You do not have to apply an extra coat of varnish if you do the painting well. Because the paint alone looks brighter and shines like a varnished model. You must certainly use an airbrush for this process. If you are going to paint with a brush than you have to make the paint thinner. You have to be careful If you are going to apply a coat of varnish with a brush. A paint that has not dried well may easily come out. During the painting process you must not touch the painted areas or your finger prints may directly transfer to the plastic. Drying time depends on the temperature of the room/area. Minimum drying and touching time is 2-3 days.
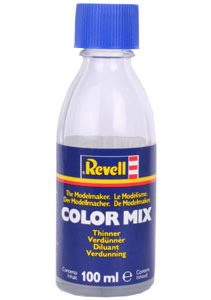
You can use this thinner to thin up the enamel paints or to mix the paints together and to use with airbrush. If you are going to apply the paint with a brush than please take a sufficient amount of paint into another cap. Use a pipette to get thinner from the bottle and then drop by drop put the thinner on the paint. If you drop the entire tinner you will have a paint like water. This kind of paint is totally useless for us. Thats why you have to do it drop by drop.
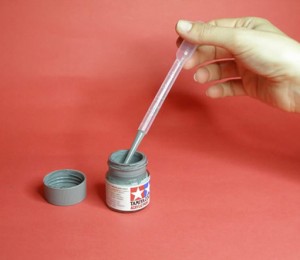
This is a kind of pipette..
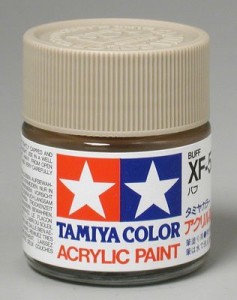
This is the acrylic paint of Tamiya. Drying time of this paint is shorter than enamel paint. Drying time also depends on the applied area and thinning ratio. Properly prepared and applied paint always gives us the best result with shorter drying time.You can apply this paint with a brush or airbrush. There is no difference in applying between enamel and acrylic paints. Only you have to use the proper thinner for right paint. Each paint must be applied with its own thinner. If you use different colors with different thinners you get a bad result.

You can use this thinner to thin up your acrylic paints, to clean the paint brushes, to mix up the paints and to use with airbrush. Do not use it with other types of paints
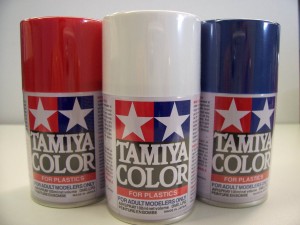
Modelers who do not have airbrush may use this enamel spray to paint large areas. If you apply it properly you can paint up to 2-3 cars in 1/24 scale.
If you use a heavy coating then the amount reduces. Te paint dries in 2-3 hours and completely hardens in 1 day. After the paint hardens apply a thin coat of TS-13 clear varnish to have a perfect result.
You can aplly this TS-13 varnish on enamel paints. You’ll get better results when applied well. If you spray it on the plastic from a close distance the paint and the varnish flows immediately.To avoid this problem always spray it from a certain distance.
So always wait for the paint to dry. Keep your model at eye level and away from spray at a distance of 35-40 cm. You can use Tamiya compounds on varnish after it completely dries.
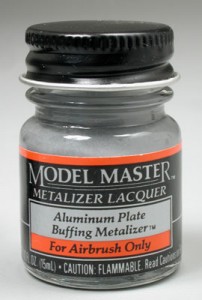
To achieve a metallic appearance you may use metalizer series paints. As its written on the paint bottle you can only use these paints with an airbrush. Because they are self thinned you do not have to add any thinner inside. You can use the paint directly with your airbrush. Most of the metallic colors are available in metalizer series. Polishing can be done on buffing metalizer colors but can not be done on Nonbuffing Metalizer paints. A soft fabric or a piece of cotton is enough to polish the paint. If you are professional enough you can use dremel with its polishing part to do this process. To not scratch the paint just polish the paint in a circular motion.
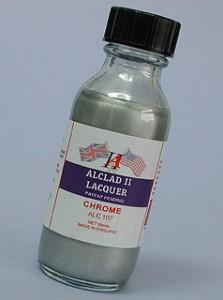
Most of the modelers dont like factory made chrome parts as they dont have a realistic view. . Therefore they remove these paints and use Alclad series paints to have more realistic chrome and metallic view. Alclad is a kind of paint that gives a high quality and realistic metal effect. You can only apply this paint with an airbrush and there is no need to add thinner inside as its self thinned.
Primers are available in 3 different colors. Black, grey and white.
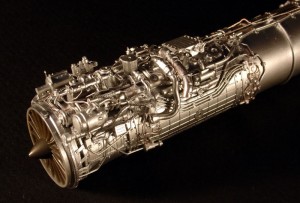
A jet engine that is painted with Alclad chrome
Airbrush and Compressor
Airbrush is the final stage in modeling.Thats why most of the modelers use airbrush for painting.It does not work alone. To use it you have to get a compressor that has an air tank.
There are two types of airbrush. Single and double action.
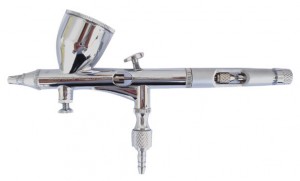
When you press the trigger in single action airbrush, paint and air both comes out together. You can not adjust the paint and air separately. You can make a mistake during the paint job. You have to begin painting from outside of the model and finish it outside. Do not spray the paint directly onto the model or it may flow.
In Double action airbrush you can adjust the amount of air and paint separately. First air comes our when you push the trigger once. When you push and then pull it back this time both air and paint goes out.
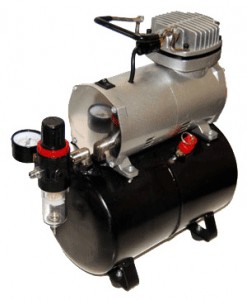
I am using this compressor for many years without any problem. It has a single cylinder engine and works quietly. An air tank is mounted under it ( 3 liters). As you can see it also has a water and moisture retainer. The air tank is enough to work on small model kits without operating it continuously. Pressure can be adjusted from the valve placed to the retainer.
Professional/Amateur Hobby Set
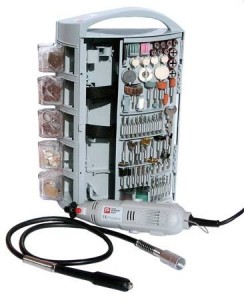
With this professional hobby set you can drill, cut, polish and do as many thing as possible with the tool set. You can work on small details easily by using its flexible shaft without holding the entire machine. This set contains many large and small parts.
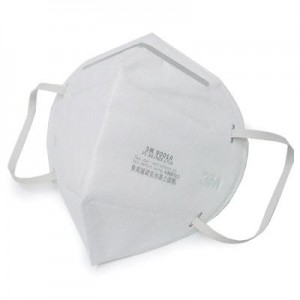
This is a simple face mask to protect you from harmful substances except the smell of chemicals and paints.
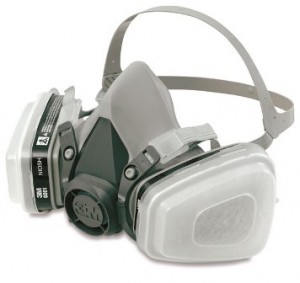
This mask is used by professionals. It contains two pieces of Carbon cartridges. These cartridges keeps all harmful pieces, paint particles and odors away from your face and lounges. The cartridges absorbs all these harmful substances. It always provides you fresh air. Always use a mask like this for your health.
Conclusion:
Up to now I tried to give you the necessary and useful information about modeling tools. Hope these information helps you. You can mail me later if you have any questions.